Organization is key in any field of work. This is doubly true in laboratories that need to keep track of large numbers of strains and specimens, store them, and record experiment results relating to them.
Labguru acknowledges the unique challenges of maintaining biocollections and offers various tools to reduce errors and save time.
Create Collections
Start from the top — separate your inventory into collections. Labguru ELN offers default collections that can be selected and added to your account, including bacteria, cell lines, fungi, worms, rodents, and more. In addition to that, custom collections can be created, and their properties can be set to match your laboratory’s needs.
Derived Collections
Sometimes, two collections have a parent-child relationship. For example, a cell line created using a certain plasmid or tissue harvested from an animal specimen. You can add a derived collection on any parent collection page, and the two collections will be linked. This makes it easier to track the history of biocollections and the relationships between them.

Populate your collections
Your collections can be filled with items. Each item page holds all the necessary information about the sample or specimen, as defined by the collection properties. Items can be added to Labguru manually, and they can also be imported in bulk.

Keep Track of Each Stock Item
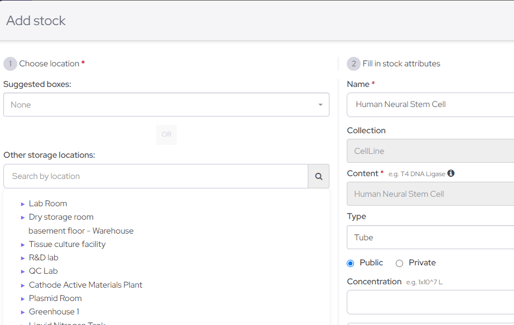
The first rule of maintaining organized storage is ensuring that everything has its home. Using Labguru, you can assign a specific location to each sample, as well as quantities of plates, boxes, tubes, or packages to ensure you never run out without knowing. You can also keep track of quantities and make sure you never run out of stock.
Connect ELN and Inventory
One of Labguru's greatest strengths is that it combines your electronic notebook with your inventory and storage management, all in one application. The Sample Element is an excellent way to connect protocols and experiments to samples and specimens. On every experiment page, you can create a list of samples used in it — and the experiment will be linked to each sample in turn. This way, you can go to a biospecimen’s page and view all experiments performed on it to get the bigger picture of the results. The sample element also links you to the item stocks so that you always know exactly which plate or tube was used in each experiment and where it is located.

Print Labels
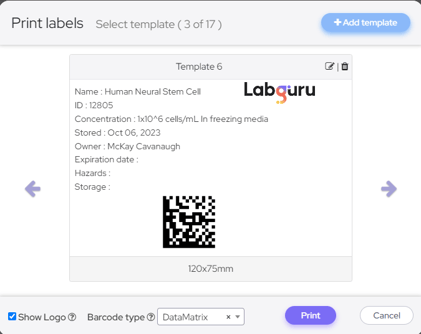
Labeling your stocks is essential when running a lab. It enables you to associate stocks with the lab inventory database and with your ongoing experiments. Labguru allows you to create your own label template, pick a pre-existing template or modify one to match your needs. The labels can include properties of your choice (name, manufacturer, expiration date, etc) as well as a QR code and/or barcode and your logo. The size of the label can be changed to match the size of your containers.
When performing an experiment, you can simply scan your stock and it will be added to the samples list on the experiment page.
Labguru also offers instrument, plate, box and storage location labels.
Labguru combines ELN, LIMS, Inventory Management and Informatics into one easy-to-use platform, made to answer all the needs of life-science labs.
For more information about how Labguru can help you, click here:
